Welcome to another portfolio post! Today, I would like to go step by step with the process I took when I upcycled a black thrift-store helmet into a grey one. This was a project I took on as part of my production design duties for Andy Young’s short, Crime of the Century.
Andy needed a nice grey helmet that could pass for a mountain climber’s for a brief shot of a character. Since this was a self produced endeavor, we had a tiny budget. However, a little cleverness and creativity made it an easy enough task. It helps that Andy is such a great guy and director!
So, Let’s begin the process!
Step One: Assess your prop in its original format. It’s an ugly, black thrift-store find with gunk and scratches.
It ain’t pretty yet.
Step Two: Clean and remove gunk! Realize that you are going to have to get rid of some of that gunk. I used my keys for this. It was pretty easy to get most of the junk off with this method. Sometimes, use of a blowdryer can also de-activate whatever the original adhesive was. Get rid of that junk!

Gunk junk
Step Three: Sand that thing! Next, you gotta sand the plastic down a bit. Since I chose to go with spray paint, I needed to make sure the plastic surface had a bit of grit to it so the paint could adhere to something. I used this 3M Sanding block I found at a hardware store. Got the job done, and can definitely be utilized for future projects.

Buff buff buff
Step Four: Separate the guts. Or at least remove the styrofoam padding from the helmet shell. You don’t want to get paint on it. This photo also shows off the newly buffed surface of the plastic shell.

Gutted!
Step Five: Tape face ties down and out of the way. Again, you want to remove and/or cover up parts of the piece that you don’t want to paint. I used an eco-friendly (…it’s green anyway!) painter’s tape. Painter’s tape, usually blue, is good for this kind of thing because it’s meant for temporary jobs. If you go with something like duct tape, you will run into another sticky junk problem!

Earth friendly tape
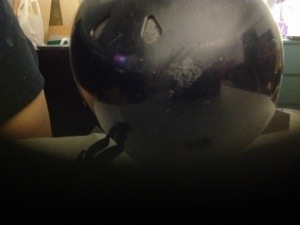
Step Six: Safety first! Obligatory, post-apocalyptic photo. What this really is is protecting the eyes, noes and face from any spray paint fumes. I took it outside for the spraying bit, but you can never be too safe!

Ready to brave the apocalypse
Step Seven: Spray that first layer. Make sure you are in a place where spraying is cool. I did it outside of my front door, but on a block of cardboard. You don’t want to upset your neighbors.

First coat
Step Eight: Admire your spray can, spray another layer. So, this was another shot to show you what the helmet looks like so far from afar, as well as the type of paint I used. It’s a Krylon Dual spray paint that includes the primer! Saves a step!

Krylon!

The best photo of this series
Step Nine: Allow to dry. Once you’ve made sure the paint job is even, give it about an hour to dry.

Coat 2!
Step Ten: Add the final matte coat. Once it’s dried a bit more, apply a finishing coat of acrylic. This will seal in the paint.

Aaaand we’re done here.
And there you have it! What did I learn from this process? I have an urge to spray paint everything! I also realized it didn’t take too much to make something cheap look much nicer. The entire process was completed in a couple of hours. Make sure to let any spray painted items dry for a full 24 hours before actually handling.
If you have any questions or need production design ideas, feel free to comment here and we can start a discussion!
